Step 1: Locate the installation position
Confirm the position and mark the distance between two adjacent RSJ posts based on the fence width of 2.75 m (cross rail length).
The Global Leader in Field Fence & Posts
Please tell us
Palisade fence is the most popular residential protection solution and excels in providing a high level of security and resistance to attack. It can be used not only as a house fence, but also as burglary-resistant single leaf security gate and double leaf security gate for residential, industrial, or commercial sites. Here we will show you the steps for installing palisade fence as fence, single leaf security gate, and double leaf security gate.
Preparation List
Fence Installation
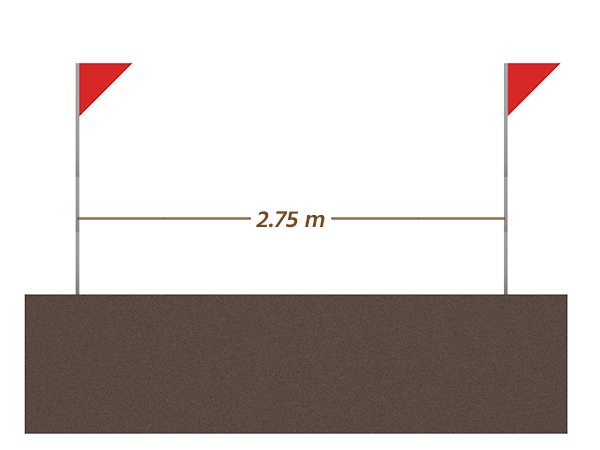
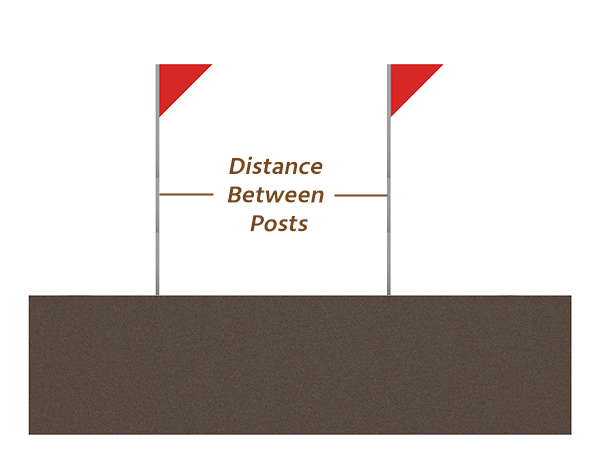
Step 1: Locate the installation position
Confirm the position and mark the distance between two adjacent RSJ posts based on the fence width of 2.75 m (cross rail length).
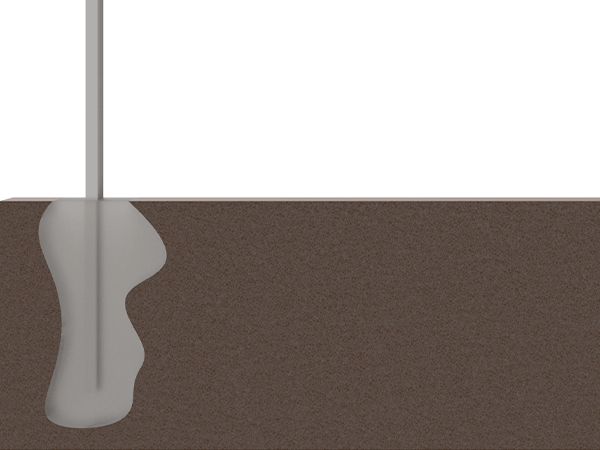
Step 2-1: Dig-in
The hole should be 35 cm × 45 cm wide; depending on the length of the RSJ post, and your hole should be at least 60 cm deep. Make sure the RSJ post is vertical and pour cement in to complete the fixing.

Step 2-2: Bolt-down
Secure the RSJ post tightly on hard ground with anti-vandal bolts.

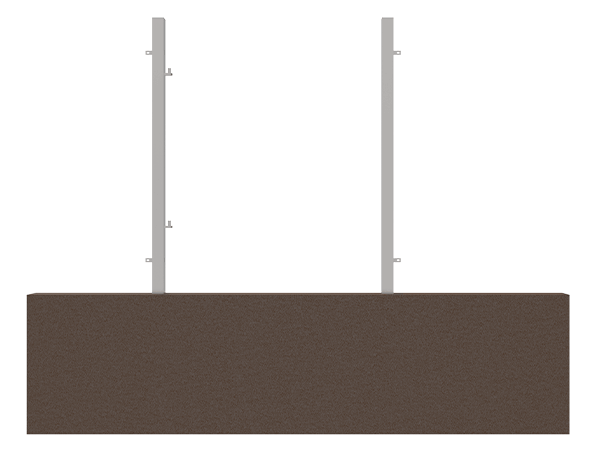
Step 3: Install RSJ posts on both sides
Reconfirm the position of the markings according to the width of the bottom cross rail and fix the 2 RSJ posts.

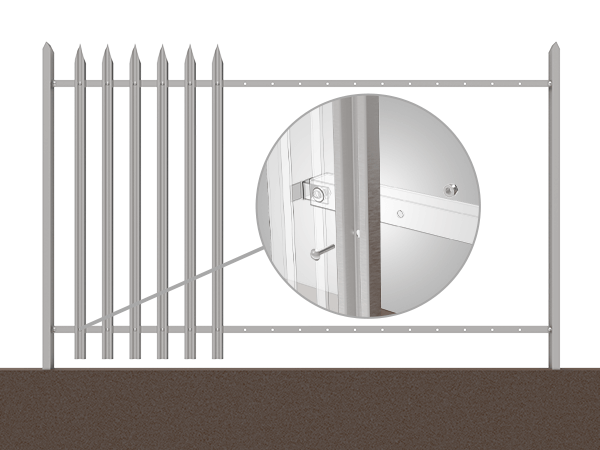
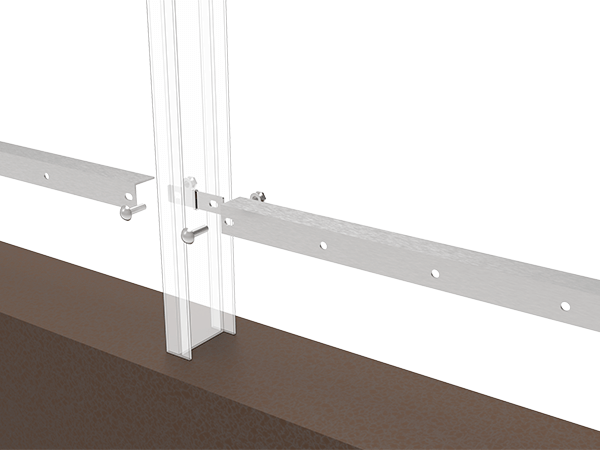
Step 4: Install bottom cross rail
Connect the cross rail in the bottom position to the RSJ post with palisade fishplates, anti-vandal bolts and nuts.

Step 5: Install top cross rail
Secure the top cross rail with connectors in the same way as in step 4.
Step 6: Install palisade pales
Fix the palisade pales to the upper and lower horizontal cross rails in turn with anti-vandal bolts and nuts.

Step 7: Complete installation
Check to ensure that each part is firmly secured and the installation is complete.
We offer 3 types of cross rail palisade fishplates, depending on the position of the RSJ posts:
Straight palisade fishplate

End palisade fishplate
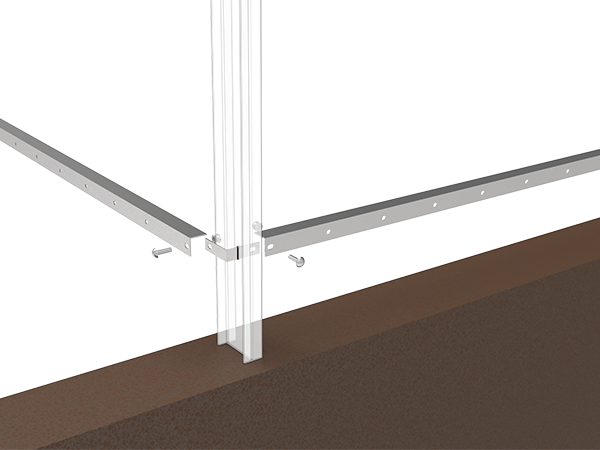
Corner palisade fishplate
1.2 M Single leaf Palisade Security Gate Installation
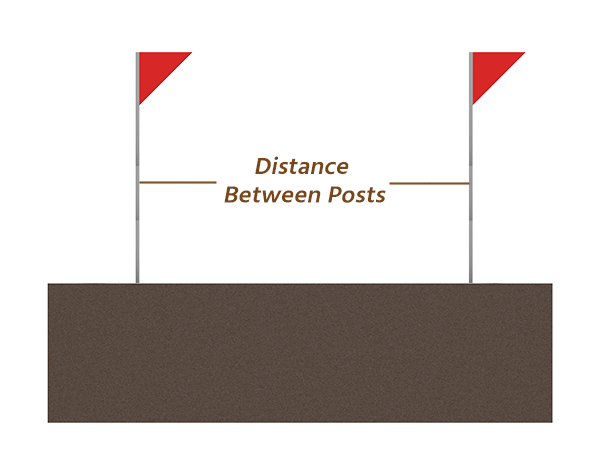
Step 1: Locate the installation position
Confirm the position and mark the distance between two adjacent square tubes based on the fence width.
Step 2: Dig-in
Secure the dig-in square tubes on both sides of the gate with concrete to ensure that the square tubes are level and aligned.
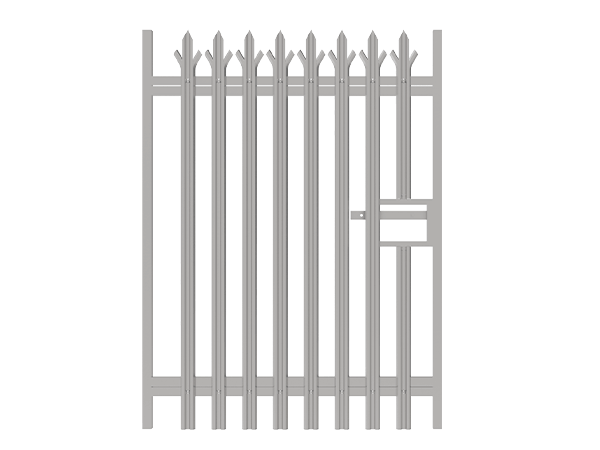
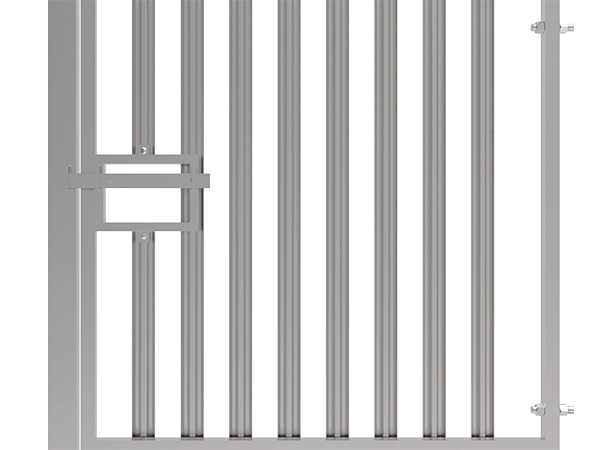
Step 3: Assemble palisade pales
Install palisade pales on the gate frame, where the 2 palisade pales in the locking position are short, and attach the lock between them.

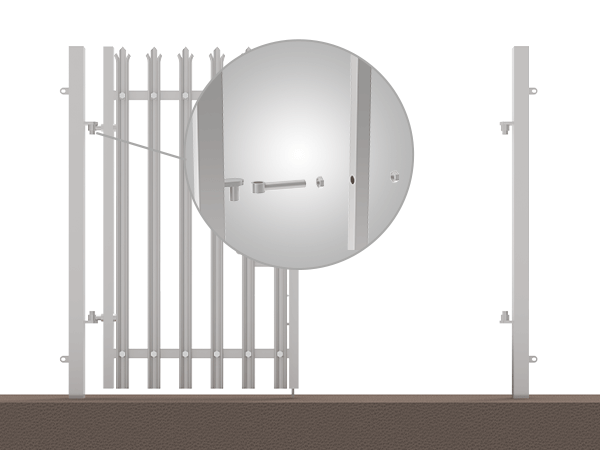
Step 4: Install gate frame
Secure the gate frame to the left square tube with galvanized eye bolt.
Step 5: Check the lock and latch
Check to make sure the latch is aligned with the lock eye.
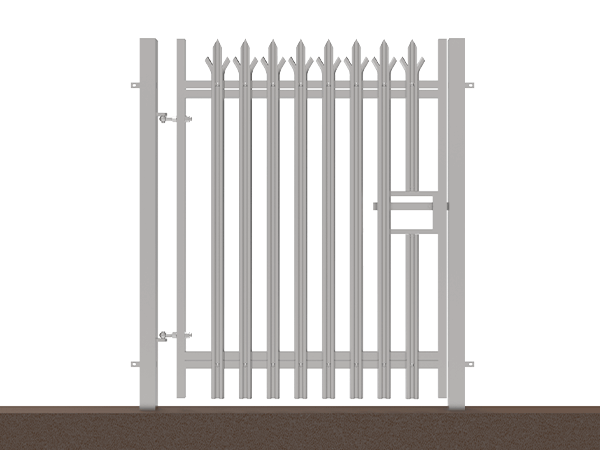
Step 6: Complete installation
The installation is complete, pictured here with the single leaf gate installed in the fence.
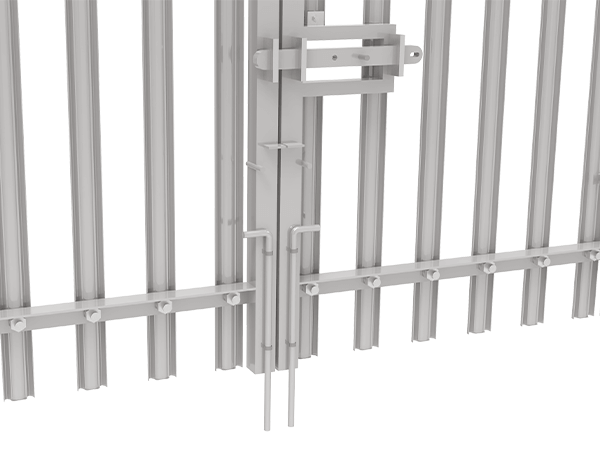
2.0 M Double leaf Palisade Security Gate Installation
Step 1: Locate the installation position
Determine and mark gate and gate post positions, and dig holes.

Step 2: Dig-in
Secure the dig-in square tubes on both sides of the gate with concrete to ensure that the posts are level and aligned.

Step 3: Assemble palisade pales on the left gate
Assemble the palisade pales on the left gate in sequence, leaving the space in place at the lock.

Step 4: Install palisade pales at left side lock
Install the 2 short palisade pales in place at the gate lock.

Step 5: Assemble palisade pales on the right gate
Assemble the palisade pales on the right gate.
Step 6: Install the left gate to left side square tube
Secure the left gate and left side square tube with galvanized eye bolts.

Step 7: Install the right gate to right side square tube
Secure the right gate and right side square tube with galvanized eye bolts.
Step 8: Check the lock and latch
Check to make sure the latch is aligned with the lock eye.

Step 9: Complete installation
Check that the parts are firmly secured and the installation is complete.
We provide different specifications of palisade fences to meet the building protection needs of different environments such as industrial, commercial, residential, etc. If you want to know more about our palisade fence, please contact us.